Thursday, October 25, 2012

Future DIY

As winter comes creeping around the bend, yes Colorado had its first major snow of the year this morning, I am thinking of the next renovations that Andrew and I will be doing. Andrew explained after tiling the kitchen that it was the last major remodel job of the year. I will be doing plenty of crafts though! Especially Christmas presents, which we are making this year. I just finished all of our stocking stuffer presents for the family but I unfortunately can't share my plans on those until after December 25. My family occasionally drops by my blog to catch up. Even though we are done with renovations for the year, Andrew and I are quickly adding to our DIY list. Here is what is on the agenda for next year:

1. Spring: renovate the Master Bathroom. This is the final room that needs to be stripped bare. We will be replacing the shower door, the vanities, the lighting, the trim, and the flooring. It will be gorgeous! We are thinking of a nice grey color for the walls with green, white, and stainless steal accents.

2. Spring: after the master bathroom has been gutted and we get our tax return from the good ole IRS, we plan on replacing all the carpet in the house (which is a lot less than it used to be!). This includes the stairs, living room, hallway, master bedroom, office/future baby room, and master closet. Not too bad and I cannot wait!

3. Summer: Paint the Kitchen Cabinets. With the beautiful new tile, the cabinets are no longer cutting it. We are planning on a dark espresso color with stainless steel hardware. Oooo...it is going to be so sexy!

Well, those are what we have planned for the future. We are going to be BUSY! We hope you stay tuned. Expect plenty of crafts, recipes, and stories until then.

Follow Me on Pinterest

Friday, October 19, 2012

DIY Cupcake Liners

I was baking pumpkin cupcakes yesterday for my parent's annual Fall corn maze and chili dinner party when I realized that I didn't have any cupcake liners! I did not want to have to run out to the store just to buy the paper liners, so I thought about how I could make them myself. It didn't seem very feasible to make paper liners as I didn't have the time to figure out how to do that. Then it struck me, foil! This was probably the easiest way to make cupcake liners EVER!

Supplies:
Pen
Scissors
Foil
Cupcake Tray
7-Inch Diameter Bowl

Here's how I did it:

First, pull out a long sheet of foil. Next, lay the bowl down on the sheet and outline the rim.
Next, cut the cirle out and center on the cupcake tray.
Use either the end of a pen or your fingers to smooth the foil into the shape of a cupcake liner.
Once, you are done, remove the liner from the cupcake tray and trim the extra foil with scissors.

And, voila! You have perfectly functional cupcake liners! This was so easy and the cupcakes baked perfectly. They are delicious.

Follow Me on Pinterest

Delicious Gluten Free Apple Crisp

We had some very sweet friends come over last weekend for dinner and games. They are doing a gluten free diet which caused me to have to expand my ingredient horizons. Here is what we made: Spicy Thai Noodles with Rice Noodles and Gluten Free Apple Crisp.

Thank you Small Snippet and Gluten Free Mommy! You made our night a success. After eating, we played a game of Settlers of Catan. So much fun!

I have to say that the apple crisp was DELICIOUS! We ate it for breakfast the next morning. Hey, it's gluten free, it must be healthy! ;)


If you are looking for a semi-easy gluten free dinner, these are the dishes that I recommend! Follow Me on Pinterest

Tuesday, October 16, 2012

Adventures of a Dealaholic

I absolutely LOVE thrift stores and finding good deals. I love finding things new or barely used (especially clothes) for which I paid only a fraction of the price. My husband doesn't understand my fascination but he does like saving money. It's like a sport or a great urban adventure.

The trick to any thrift store shopping is to find a thrift store in a good area or close to a wealthy neighborhood. The Goodwill I frequent to find new treasures is in Cherry Creek and only 5-minutes fromt the Cherry Creek mall. Talk about a good neighborhood. I have gotten practically new Calvin Klein, Nine West, and Tommy Hillfigure. After a nice washing to remove any germs, no one could tell the difference and I looked like a million bucks!

Another excellent place to shop is the Goodwill online store. This online store operates like ebay and pools items from Goodwills across the nation. I got a brand new, with the tags, Saks Fifth Avenue dress for $16. It was pretty...

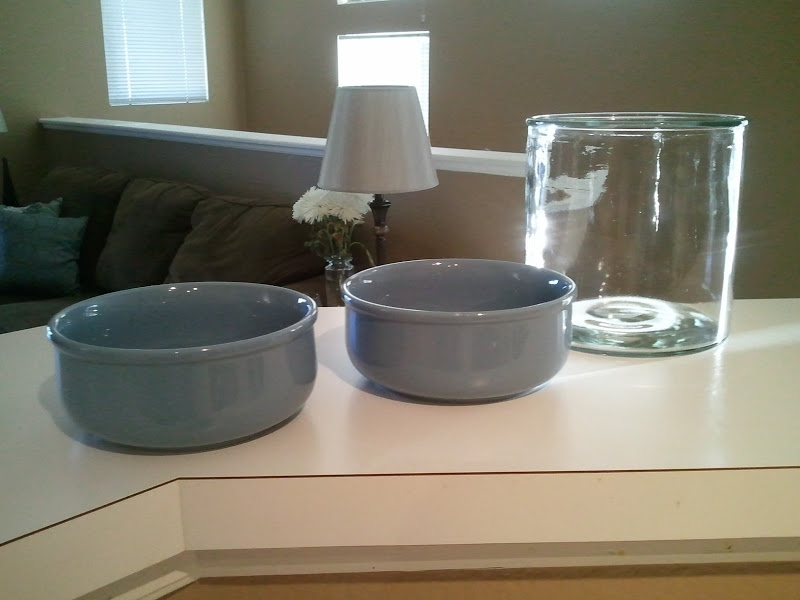
So, driving home yesterday I felt that I should drop into Goodwill and case the joint for some good finds. I was blessed with an apothecary style vase and two ceramic bowls for my cat. All for $3.20.

Here they are! The apothecary jar was $2 and each bowl was $0.49.


Here are our cat's bowls before. These worked with tacky linoleum but now they don't look very good with the beautiful tile.

So much better!!! Now our cat is stylish.

I had no practical need for this jar. But, as soon as I saw it, I fell madly in love! I was thinking that it would look cute with a pretty candle in it but then I discovered a much more practical use:


It is now our very functional receipt jar. Every month Andrew and I record our expenses in an excel spreadsheet (the expenses that can fluctuate such as food and entertainment and gas expenses). This helps us to stay in budget and save a portion of our income every month. After tiling the kitchen there were several receipts to fill the jar. We really need to get these into our spreadsheet so that they can be thrown away...lol. 


So, there you have it; my most recent finds. For those looking to set out right away to the local thrift store, here is some advice.

1. Choose your thrift store wisely (keeping in mind location and the type of donations that would be made)
2. Be very very picky. Do not fall prey to the hysteria of having to find something amazing. Keep your standards and don't be suckered into buying something that isn't up to those standards. Don't see a name brand and instantly assume that it is awesome. Make sure it looks awesome and is your style
3. Don't come in with an already conceived notion of what you are looking to buy. Chances have it, you won't find anything and you may miss out on a lot of other treasures. If you are looking for anything in particular, be willing to be disappointed and to find something else that you didn't anticipate

Good luck adventurers and may you be blessed with an abundance of treasures!

Friday, October 12, 2012

Homemade Spaghetti and Meatballs


Spaghetti is comfort food to me. Not because I am instantly drawn to eating pasta when I am having a tough day but because spaghetti and comfort after a long difficult day will forever be engrained in my brain as synonymous. Back in highschool and college, if I had a bad day, I seemed to always come home and spaghetti was on the menu for dinner. My family would force me to sit down and eat and the meal would sink into me and warm me up inside. So, everytime I eat spaghetti, I instantly feel comforted.

Now that I am a married adult, it is my turn to establish a delicious recipe for spaghetti. My mom has a version and my grandpa another version. So, I decided to step out and create a spaghetti recipe all my own. Can I say that it is yummy?!?! IT IS YUMMY! Anyway, it is delicious and easy and, as my husband says, way better than premade jars at a store (that's right Ragu, I'm talking about you!).

Here it is:

Makes 4-6 servings

Sauce Ingredients:

1.5 Tsp Better than Bouillon (Beef)
1 Tsp Oregano
1Tsp Salt
1Tsp Pepper
1 Tsp Basil
1/2 Tsp Garlic Powder
2 Tbs Olive Oil
3 Large Garlic Cloves (Minced)
2 Cans Diced Tomatoes
1 Can Tomato Paste
1 Medium Sized Onion (Diced)

Meatball Ingredients:

1/2 Lb Ground Beef
1/2 Lb Sausage (either italian or breakfast, I only had breakfast and I couldn't tell at all!)
1 Egg
1 Tsp Salt
1/2 Tsp Pepper
1/2 Tbs Onion Powder
1/2 Tsp Garlic Powder
Olive Oil

To make the sauce, brown the garlic and onion together until transparent. Next, add the remaining incredients and seasonings and let cook on medium for 15 minutes. Now, here is my secret trick to speed the whole process up considerably. Poor all the cooked ingredients into the blender and blend until you reach a nice sauce consistency (to each his [or her] own). Return the sauce to the pan after blending and heat for an additional 10 minutes on low or until ready to serve. This is a good time to boil the water and cook the spaghetti noodles while making the meatballs.

To make the meatballs, combine all the ingredients in a bowl and mix well with your fingers. Next form into balls. My meatballs were approximately 2 inches in diameter. But, the size can be adjusted depending on how many or how few you would like. Coat the bottow of a pan in olive oil and heat. Place the meatballs in the pan and cook on medium twisting the meatballs to be browned on all sides with tongs occasionally until completely cooked (approximately 10-minutes). After the meatballs are cooked and browned on all side, place the meatballs in your spaghetti sauce and keep warm on simmer until ready to serve.

My recommendation is to serve this meal with either green beans or a nice salad with a side of garlic bread. However, as you can see by my picture, I was lazy (after my not-so-great day) and only made some garlic toast. However you like to serve your spaghetti, I hope you enjoy the meal!


Follow Me on Pinterest

Thursday, October 11, 2012

Tiling the Kitchen

IT'S DONE!!! The dreaded white linoleum is now gone and beautiful tiles have been laid to replace them in the kitchen. After 7-days of work (without a kitchen stove and almost entirely all takeout/fast food), we now have a beautifully tiled kitchen floor. Here are the photos for the entire process. I hope you are as dazzled with the transformation as we were!

Here are our before shots:


Then began the process of tearing up the linoleum. We found that the construction builders had laid bacherboard under the linoleum instead of applying it directly to the floor board. Hooray! That knocked off a huge chunk of work for us. Backerboard is one of the worse things to cut and lay.

Next, we laid the main tiles.

Andrew then cut the special tiles and laid them 24 hours later.


After another 24-hours of drying (or at least close to it), we applied the grout. This meant cleaning the gaps first (my job!).


Then after letting the grout set for 30 or so minutes, the grout needed to be smoothed and cleaned.

While Andrew worked on sealing and cutting, I worked on staining and painting.
After much ado, here is the finished product (approximately 48-hours after the grout was finished we were able to move the appliances back into the kitchen).


Isn't it pretty?!?! The tile in the kitchen now matches the tile we did in the dining room last year. I want to say thank you to my husband for working so darn hard and for putting up with his very moody wife. I love you Andrew! Thank you for all the hard work, skill, and wisdom you have. I am so blessed by you. Thank God this is finished!!!
Follow Me on Pinterest