Ok y'all. This project has been exhausting and you will soon see why. I'm sorry it has been so long. We have actually pretty much finished the bathroom. But, let me tell you, after using every ounce of energy to work a full week and then work on the house I didn't have much left for writing. But, I can now get back to teaching how to remodel or at least lay tiles!
Day 4: After laying the backerboard, you will need to let it dry for hours. So, this day, you can't do anything. That was easy. :)
Day 5: Today's the day! You get to lay the main tiles. First, clean the surface of the floor with a vacuum. Next, measure the center of the room and mark it with a pencil at the top of the room, the middle of the room, and the base of the room. Then, use a chalk line to line up on all three middle points. Pull up the middle of the string and let it snap against the ground (you will need two people to do this). This will leave a chalk line down the room. Mix your mortar (buy a mixer hookup for your drill for this, it is about $10-$15 and it is so worth it). Mix it, wait ten minutes, and mix again. Now use the trowel and lay strip of mortar down and don't forget to put in your grooves. Measure your tile to find the center and mark the top and bottom with a pencil. Line up the markings with the chalk line on the floor. Next, use spacers to put in tiles on both sides. Once they are all placed, apply pressure to make the tiles stick firmly to the mortar. The next line, use two tiles and spacers on opposite sides of the chalk line. Repeat this pattern until completed with the main tiles (the tiles that don't have to be cut).
Day 6: The tiles have to rest for 24 hours to allow the mortar to dry. Don't step on these tiles, you could crack the mortar underneath and cause the tiles to be weakened. You don't want tiles popping up after a few months!
Day 7: Now you have to do the more technical stuff. We bought a wet saw because we had so many rooms to tile and it was work investing about $120 (we got a good deal at Lowes). However, if you have only one room, we recommend renting a wet saw from Home Depot or Lowes for this step. Lay your tile over the gaps that need to be filled. Mark the cut line with a pencil. Cut with the wet saw (outside and with ear and eye protection). After you are finished with the cuts, clean the floor where you will be laying them (be sure that there aren't any dry chunks of mortar from Day 5, if so chip them off with a screwdriver or butter knife). Lay the cut tiles with spacers (we used 3/16" on our floors) and the same mortar system that you have perfected.
Day 8: Let the cut tiles rest and dry for 24 hours. Take a breather, you will soon not have these days off in between.
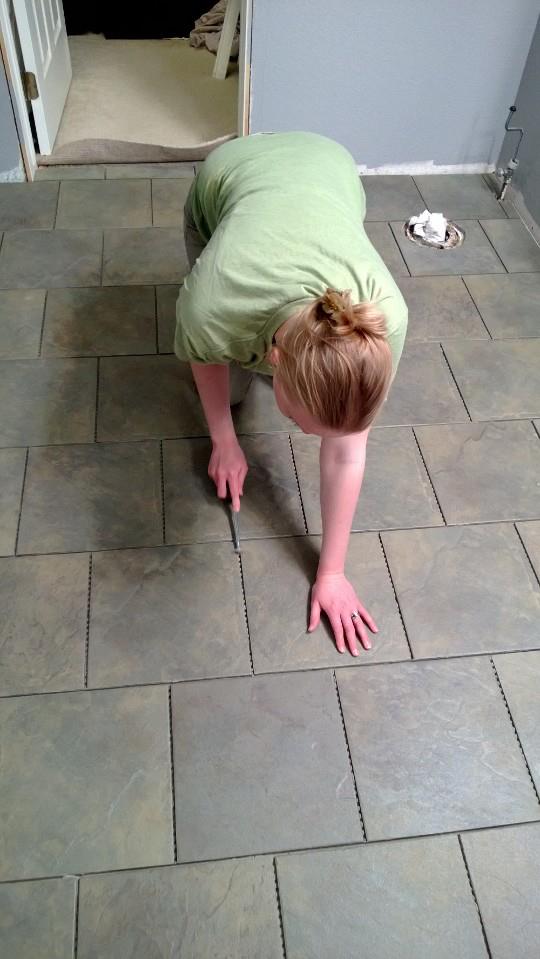
Day 9: It's grout time! Soon, your beautiful floor will be one solid surface. Remove all the spacers. Use a grout chipping tool and make sure that the gaps between the tile do not have any dry mortar sticking up. You want to be sure that the grout fills the gaps at the top without any mortar sticking up into the surface or on the tile. Next, follow the instructions on your mortar in mixing the proper consistency (use your power drill mixer hookup for this, you will thank me later). When it comes time to pick out your grout, you will hit the age old question of sand vs. unsanded grout. Here is how it was explained to us, sanded grout is for areas that will get a lot of tread and wear and tear. Unsanded grout is for small gaps in areas that get gentle use (like a back splash). We used taupe sanded grout and used a sealant that is mixed into the grout in place of water. So much easier!!! Use a grout float (the shape of a trowel only made out of a hard rubber so as to not scratch the surface of your tile) to push the grout into the gaps. Fill all the cracks, wait 15-20 minutes and then return with a bucket and large flat sponge. Use this sponge and water to gently smooth the grout and clean the surface of the tile. Be careful not to rub the grout away! You want to get as close to flush with the corners of the tile without going over the tile's edge. Don't worry about getting everything cleaned, you will be able to get the haze buffed off in a day.
Day 10: Let the grout rest for 24 hours. After these 24 hours are passed, use a rag to buff the haze/dust from the tile. Be sure to wear a cloth over your nose and mouth otherwise you will have grout colored boogers (you have been forewarned). Now, step back and look at your beautiful, finished floor.
Here are our pictures of Days 4-10!!!
Day 4:
Day 6:
 |
| One helpful bit for small spaces that you can't fit your trowel in: put the mortar directly on the back of the tile and then stick to the floor. |
Day 8:
 |
| I recommend using rubber gloves. Grout dries out your skin and it is good to protect it! |
 |
| You can see that the tiles are pretty hazy. This will be buffed out in a day or so. |
Day 10:
 |
| My make shift mask: a cheap scarf that I tied around my face. You could probably buy a cheap paper mask but it probably won't be as comfortable! |
 |
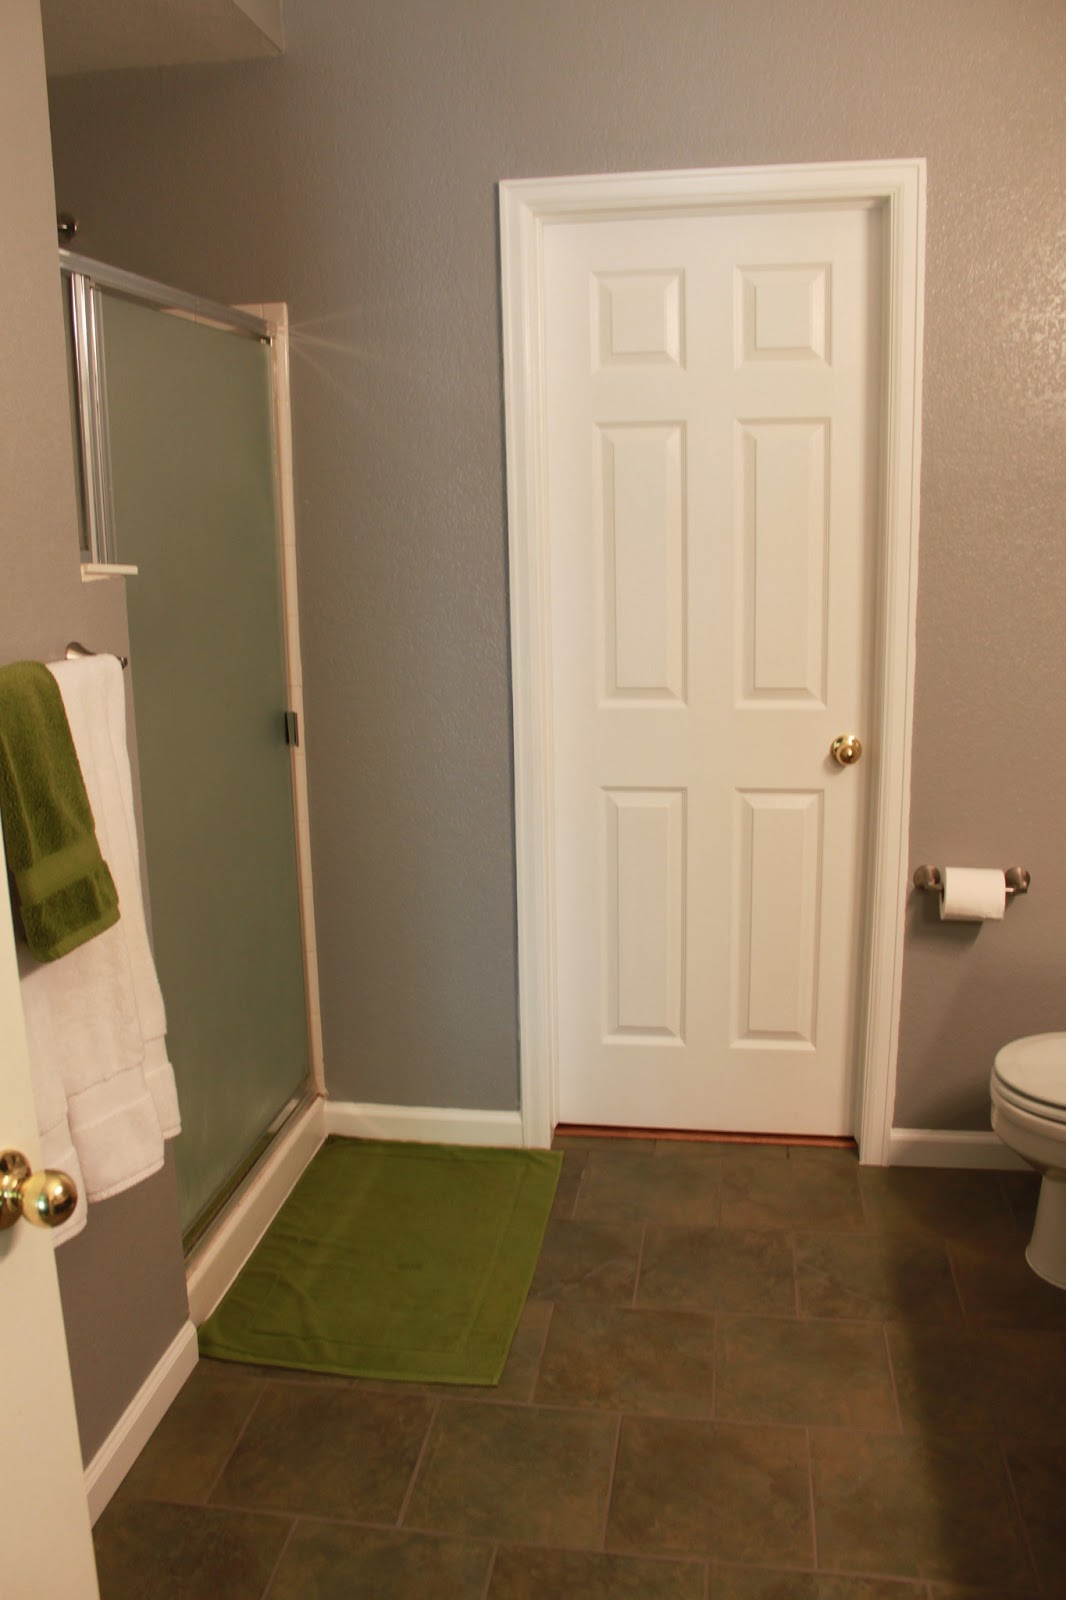
| Viola! A finished floor!!! |
And that is how you tile a bathroom floor! Please note that this is how you tile a porcelain tile floor. Real tiles require special care when finishing the grout, please do your research if you chose a different type of tile. :)
Next are the finishing steps! Coming soon...
If you liked this post, check out:
Master Bathroom Renovation: Days 1-3
Master Bathroom Reveal